博文
Yanhua Module 33 MQB-80 Thumb Screw-Fastened Interface Board Installation Guide
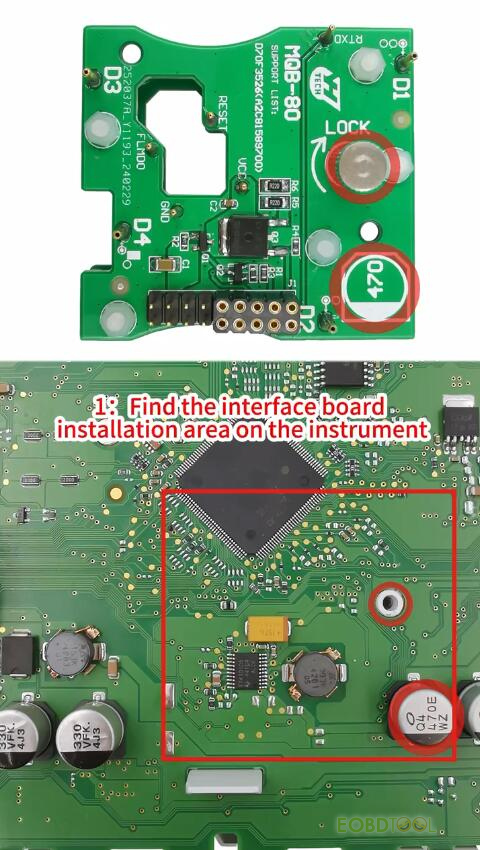
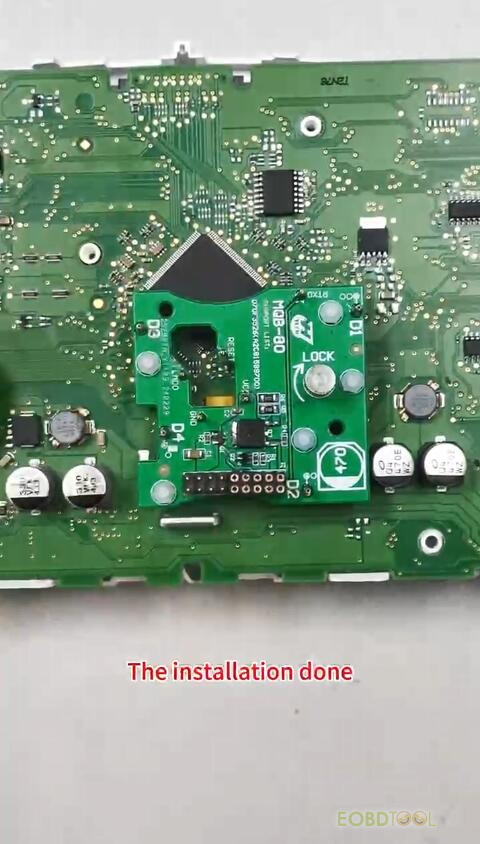
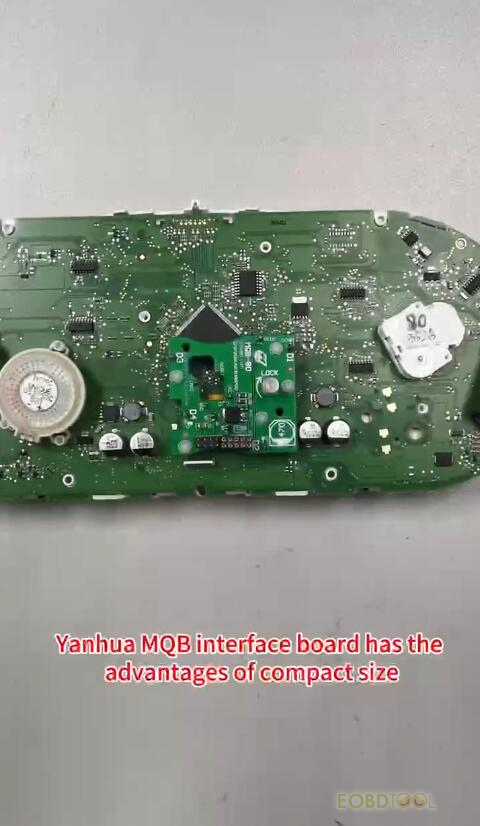
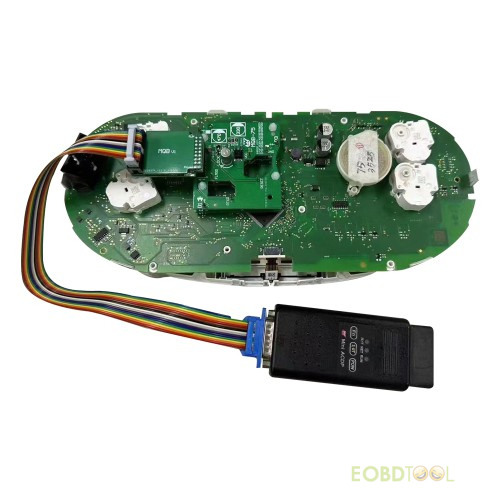
This post provides a detailed guide for installing the Yanhua Module 33 MQB-80 Thumb Screw-Fastened Interface Board on the MQB48 instrument. Once installed, it can be used to add new key/all keys lost and mileage correction with Mini ACDP/ACDP-2.
Step-by-step Guide:
Step 1: Locate the installation area for the Module 33 interface board on the instrument.
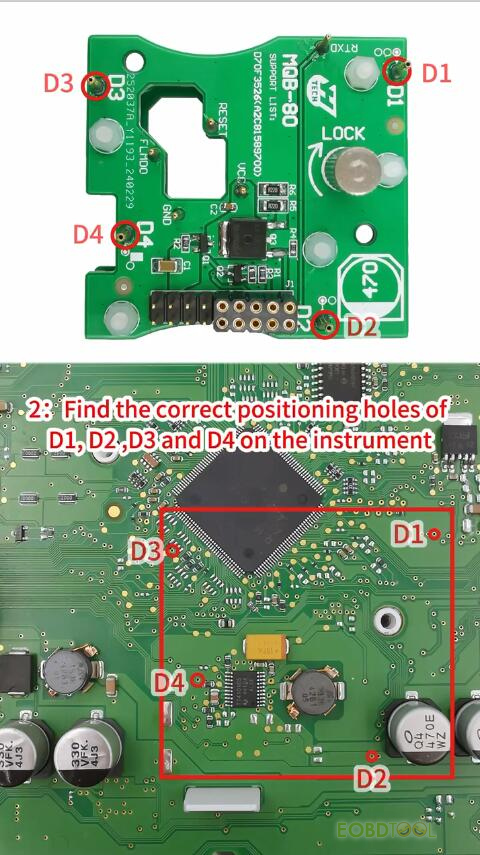
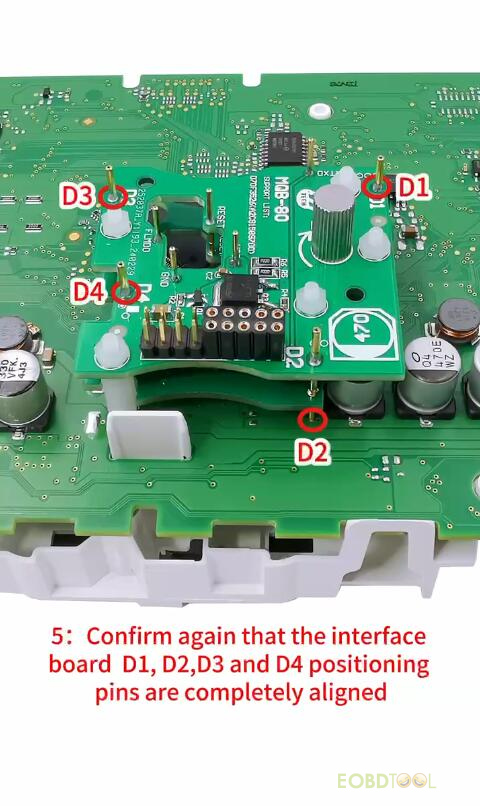
Step 2: Find the correct positioning holes of D1, D2, D3 and D4 on the instrument.
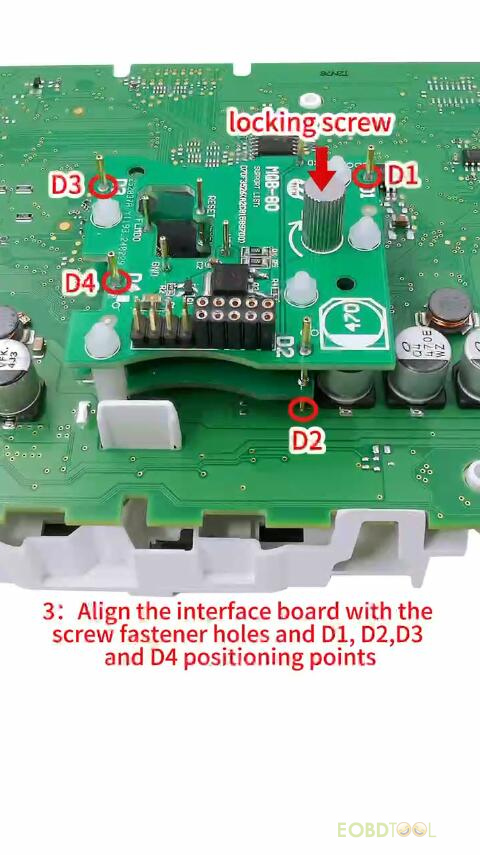
Step 3: Align the interface board with the screw fastener holes and the positioning points for D1, D2, D3, and D4.
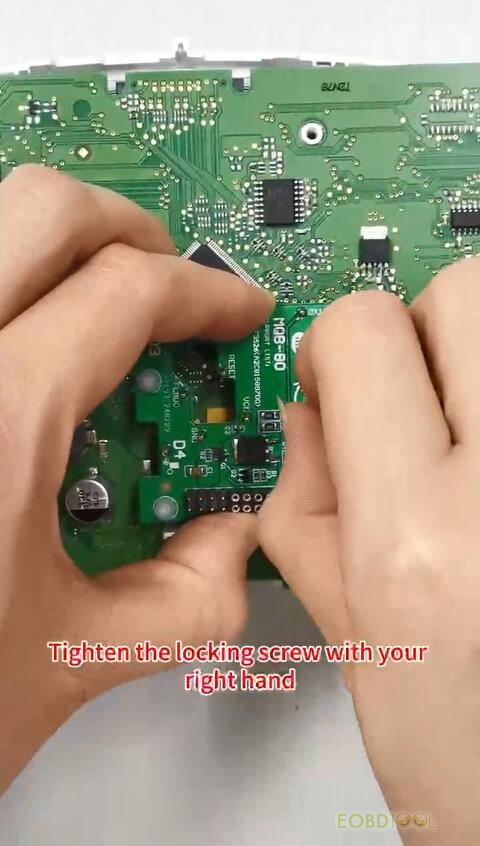
Step 4: Use your left hand to press down on the interface board, while tightening the locking screw with your right hand.
Step 5: Double-check that the positioning pins for D1, D2, D3, and D4 on the interface board are perfectly aligned with the corresponding positioning holes on the instrument.
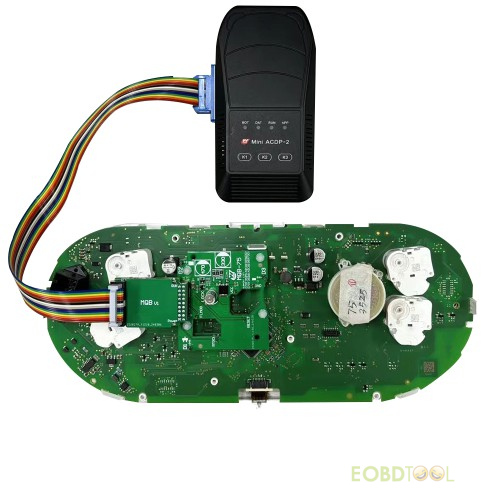
Once the Yanhua Mini Module 33 MQB Interface Board is installed, connect it to the Mini ACDP 2/ACDP.
Read also:
How to Install Yanhua ACDP Module 33 for MQB48 Key Programming/ Mileage Correction?
(incl. MQB-75 Thumb Screw-Fastened Interface Board, MQB-77/ MQB-87 Lock Fastening Interface board)
http://blog.eobdtool.co.uk/how-to-install-yanhua-acdp-module-33-for-mqb48-key-programming-mileage-correction/
免责声明:本文中使用的图片均由博主自行发布,与本网无关,如有侵权,请联系博主进行删除。
全部作者的其他最新博文
- • 2025 Launch X431 Scan Tool Add-on Module Support List
- • PADFlash ECU Programmer Customer Feedback
- • How to Correct VW MQB RF7F01404/1406 Mileage with Yanhua ACDP2 and Module 34 on
- • How to Update Autel IM508S via SD Card?
- • Xhorse MCVI PRO J2534 Program and Diagnosis Vehicle Guide
- • Autel/OTOFIX Update BMW G-Chassis BDC2 Add Key IMMO Programming
