博文
How to Install Yanhua ACDP Module 33 for MQB48 Interface Board for for Key Progr
Yanhua Mini ACDP Module 33 is newly released to work with Mini ACDP-2/ACDP-1 for MQB48 new key adding, all keys lost (need to get Synchronous data from third party), and mileage correction.
Yanhua MQB interface board has the advantages below:
- Compact size
- Precise pin positioning
- Easy installation
- Pin connection is firm and stable, not easy to loosen,
- Safer data reading and writing
Module 33 comes with 13 solder-free interface boards with license, including MQB-74 to MQB-87.
It has two types of interface boards:
- Lock Fastening Interface board
- Thumb Screw-Fastened Interface board
Which module is supported by Yanhua ACDP Module 33 MQB48 Adapter?
Currently, there are 19 items supported.
MQB-74 interface board:
D70F3524 (A2C00889000)
D70F3525 (A2C81589600)
D70F3526 (A2C81589700)
MQB-75 interface board:
D70F3525 (A2C81589600)
F70F3526 (A2C81589700)
MQB-77 interface board:
D70F3525 (A2C81589600)
MQB-78 interface board:
D70F3525 (A2C81589600)
MQB-79 interface board:
D70F3526 (A2C81589700)
MQB-80 interface board:
D70F3526 (A2C81589700)
MQB-82 interface board:
D70F3529
MQB-81 interface board:
D70F3525 (A2C81589600)
D70F3526 (A2C81589700)
MQB-83 interface board:
D70F3532 (A2C81589500)
MQB-84 interface board:
D70F3532 (A2C81589500)
MQB-85 interface board:
D70F3537 (A2C81589800)
MQB-86 interface board:
D70F3535 (A2C81589200)
D70F3537 (A2C81589800)
D70F3536
MQB-87 interface board:
D70F3524 (A2C00889000)
How to install ACDP Module 33 Lock Fastening Interface board?
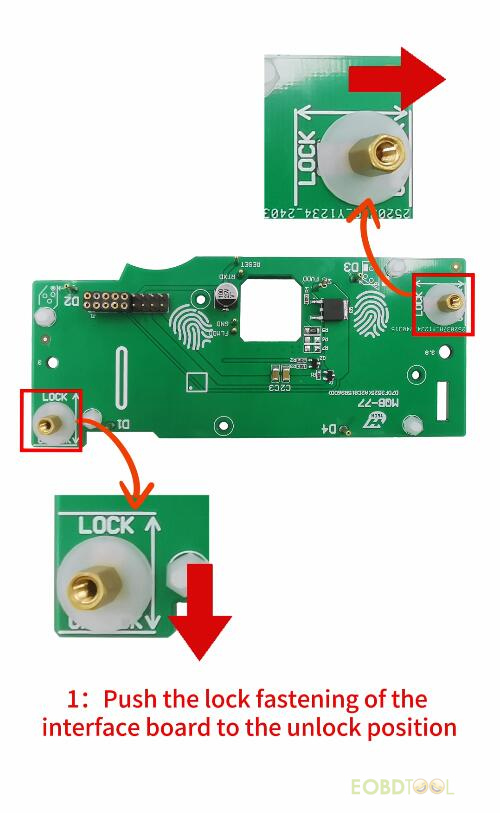
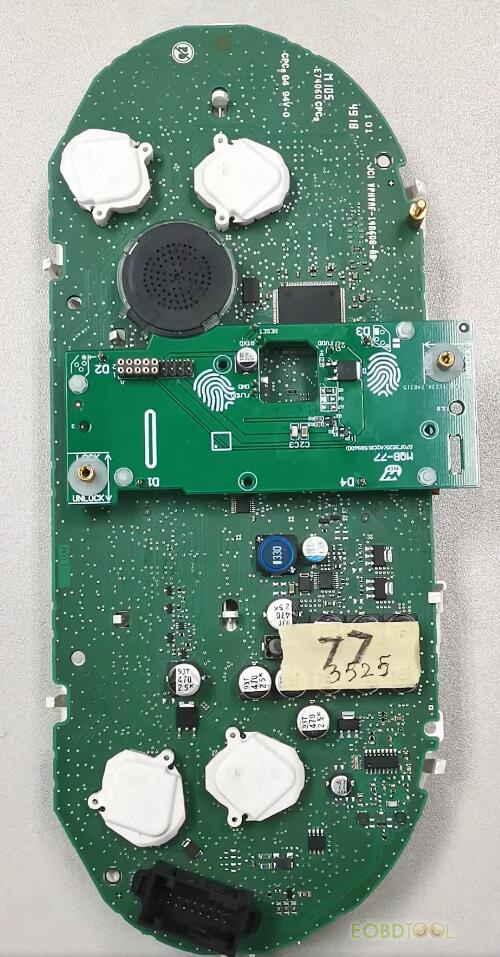
i.e.MQB-77 interface board
Step 1. Push the lock fastening of the interface board to the unlock position.
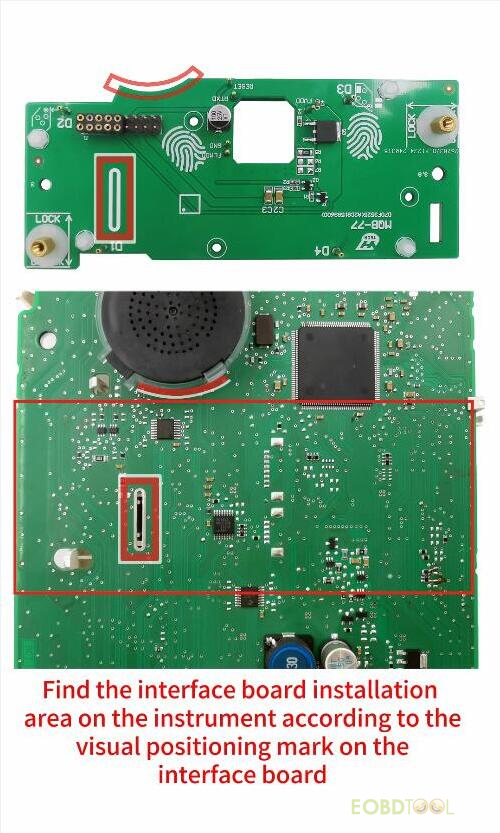
Find the interface board installation area on the instrument according to the visual positioning mark on the interface board.
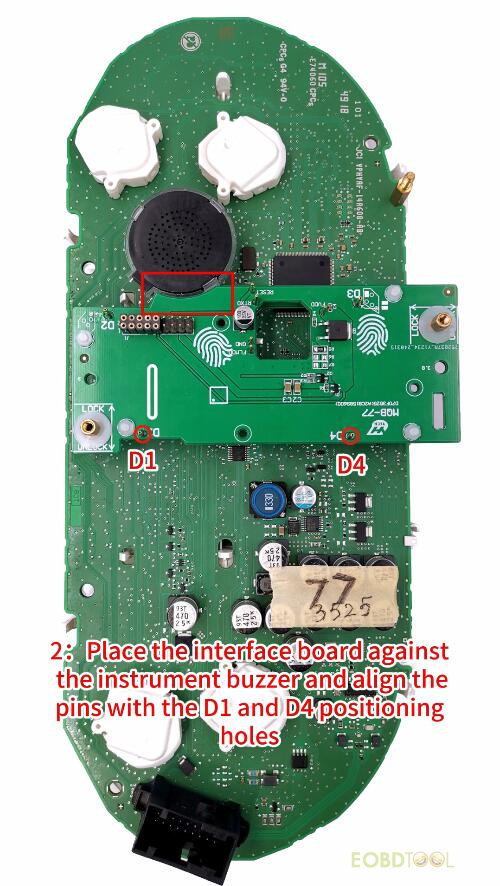
Step 2. Place the interface board against the instrument buzzer and align the pins with the D2 and D4 positioning holes.
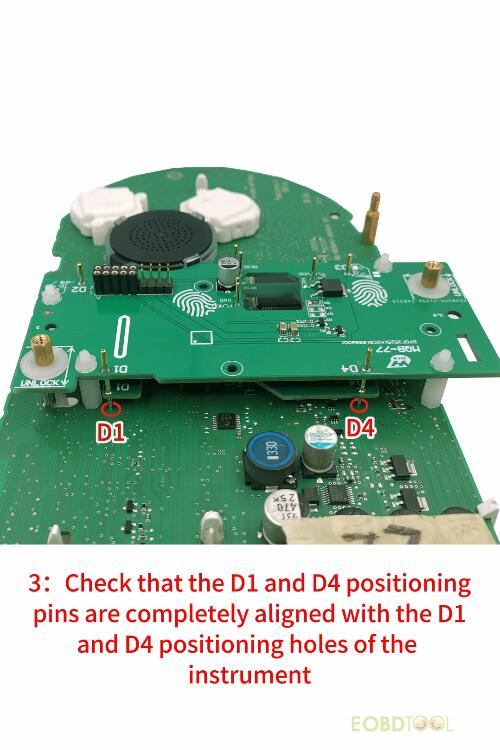
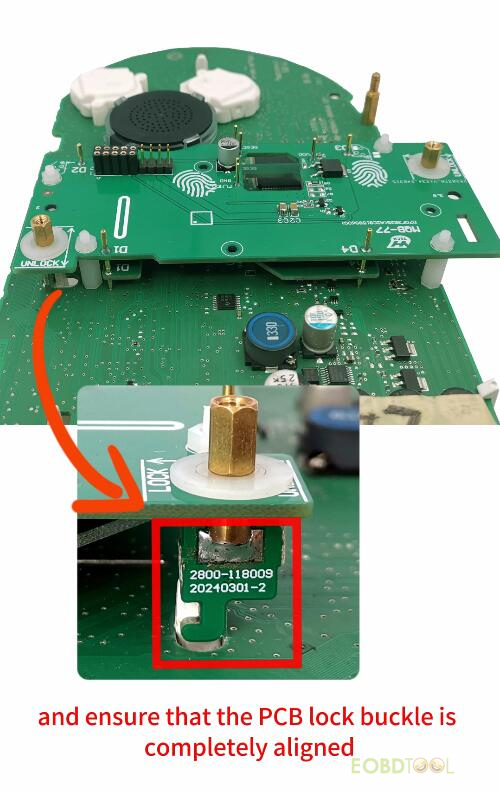
Step 3. Check that the D1 and D4 positioning pins are completely aligned with the D1 and D4 positioning holes of the instrument
Make sure the PCB lock buckle is completely aligned.
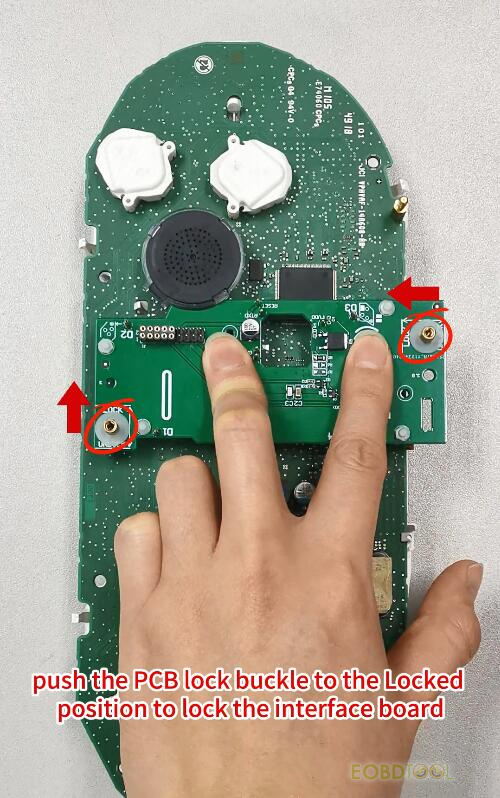
Step 4. Place your finger on the fingerprint position of the interface board.
Press down on the interface board.
Push the PCB lock buckle to the Locked position to lock the interface board.
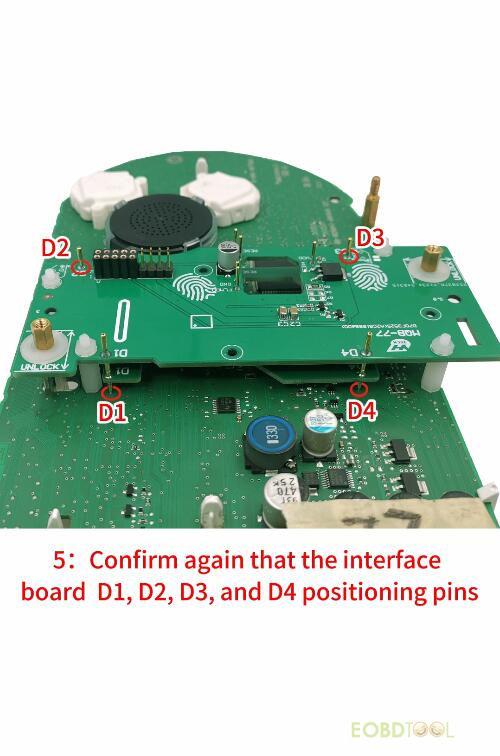
Step 5. Confirm again that the interface board D1, D2, D3 and D4 positioning pins are completely aligned with the D1, D2, D3 and D4 positioning holes of the instrument.
After installing MQB interface board, connect interface board with ACDP 2/ACDP.
https://youtu.be/2eOKR6rDn10
How to install Yanhua ACDP Module 33 Thumb Screw-Fastened Interface board?
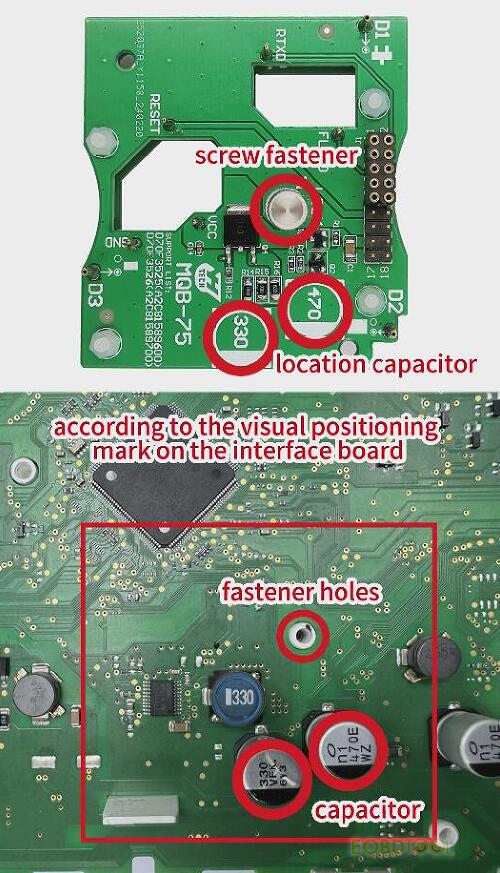
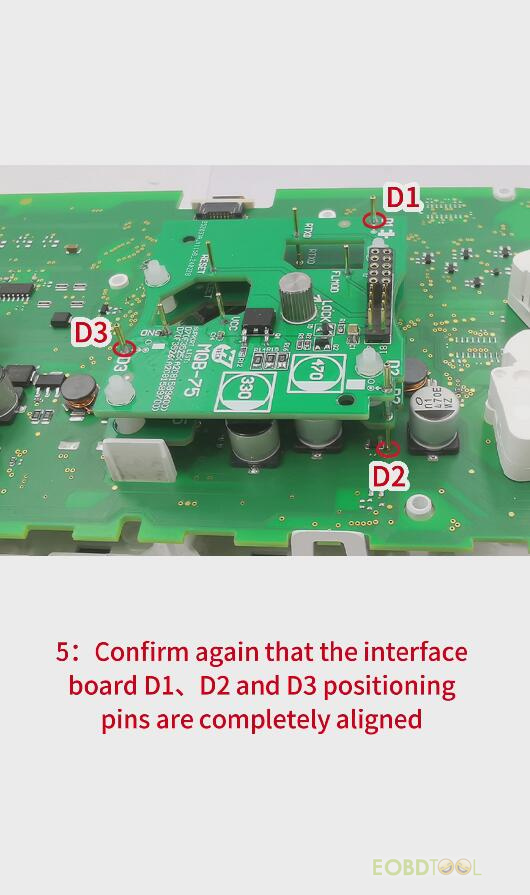
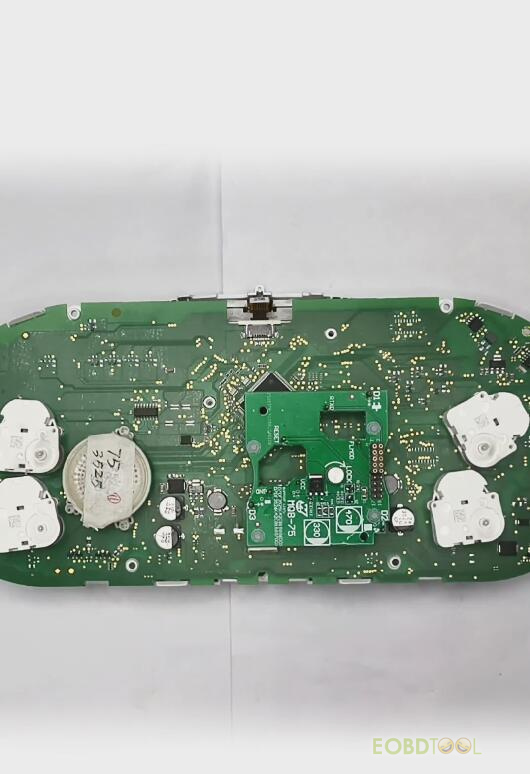
i.e. MQB-75 interface board
Step 1. Find the interface board installation area on the instrument.
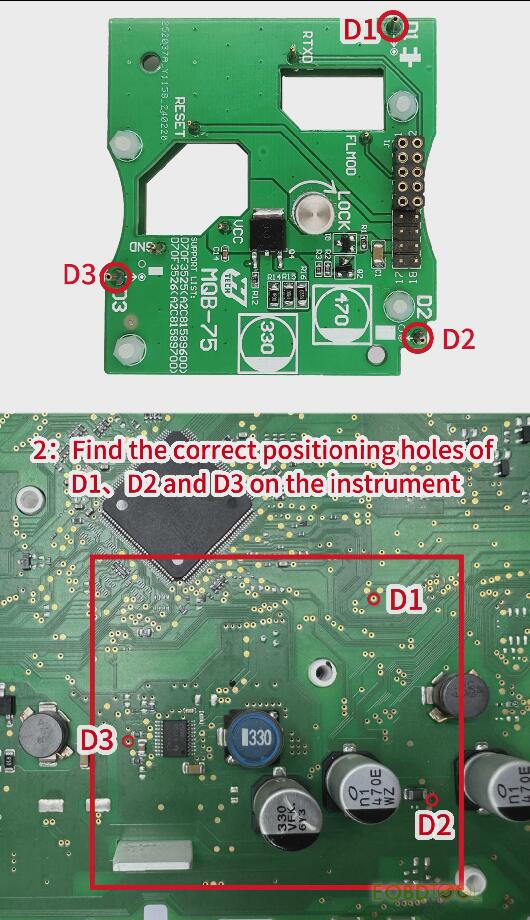
Step 2. Find the correct positioning holes of D1, D2 and D3 on the instrument.
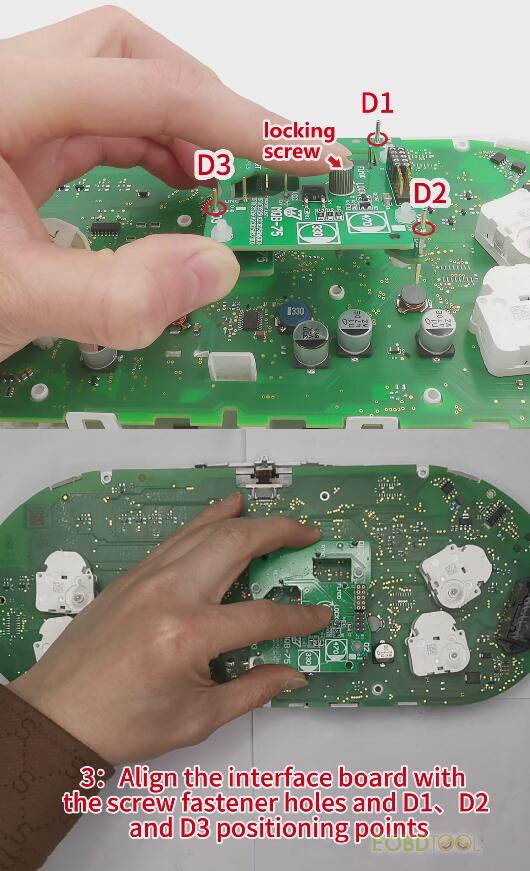
Step 3. Align the interface board with the screw fastener holes and D1, D2 and D3 positioning points.
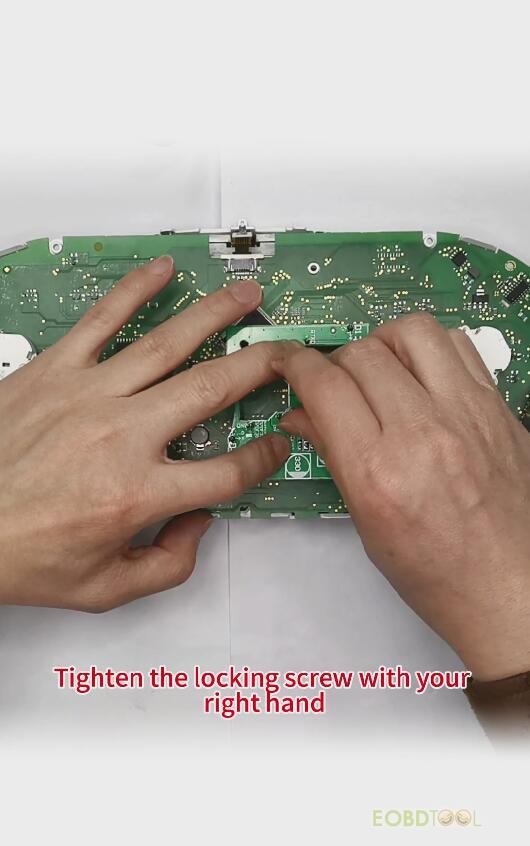
Step 4. Press the interface board down with your left hand, and tighten the locking screw with your right hand.
Step 5. Confirm again that the interface board D1, D2 and D3 positioning pins are completely aligned with the D1, D2 and D3 positioning holes of the instrument.
After installing MQB interface board, connect interface board to Mini ACDP 2/ACDP.
https://youtu.be/qcOizwpgCtY
If you are interested in this new Yanhua Mini ACDP MQB48 Module 33, don’t hesitate to order it by the following link soon.
https://www.eobdtool.co.uk/wholesale/yanhua-acdp-mqb48-immo-module33.html
免责声明:本文中使用的图片均由博主自行发布,与本网无关,如有侵权,请联系博主进行删除。
下一篇: Lonsdor K518 Update: Add GM CAN FD/ Renault/ DACIA IMMO Programming Models
全部作者的其他最新博文
- • 2025 Launch X431 Scan Tool Add-on Module Support List
- • PADFlash ECU Programmer Customer Feedback
- • How to Correct VW MQB RF7F01404/1406 Mileage with Yanhua ACDP2 and Module 34 on
- • How to Update Autel IM508S via SD Card?
- • Xhorse MCVI PRO J2534 Program and Diagnosis Vehicle Guide
- • Autel/OTOFIX Update BMW G-Chassis BDC2 Add Key IMMO Programming
